Getting Started
If you haven’t already done so, you will be prompted for your Club Name and License Key every time you start Finish-Time. If you are only evaluating Finish-Time for now, just click Demo. Otherwise, enter your club’s name and License Key, then click Register. Your License Key can be copied from your finish-time.com account that was used to purchase this key.
Getting to Know Finish-Time
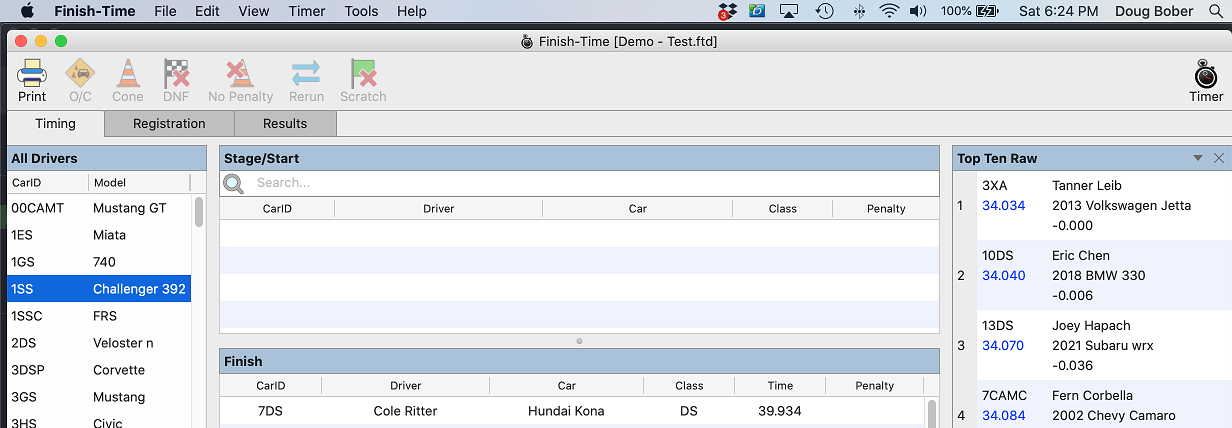
Finish-Time is designed as a tabbed document interface (TDI) application. Driver staging, registration, editing and publishing, etc. are built into multiple dismissible tabs. The layout is similar to modern web browsers, it minimizes the need for addition windows and dialogs that clutter the screen, all the while keeping them in easy reach.
The size of the user interface components is customizable too. The reason may not seem apparent at first, but when running Finish-Time on a laptop computer in the back of your club’s timing and scoring vehicle with the sun in your eyes, while trying to move the cursor with a track pad in the middle of summer, you will appreciate this design.
Behind the scenes, as drivers pass through finish, data acquisition, sorting, penalty calculations are performed with no intervention needed. During a timed competition event, this leaves the operator the task of staging drivers, and handling penalty assessment during or after their run.
In this article
The User Interface
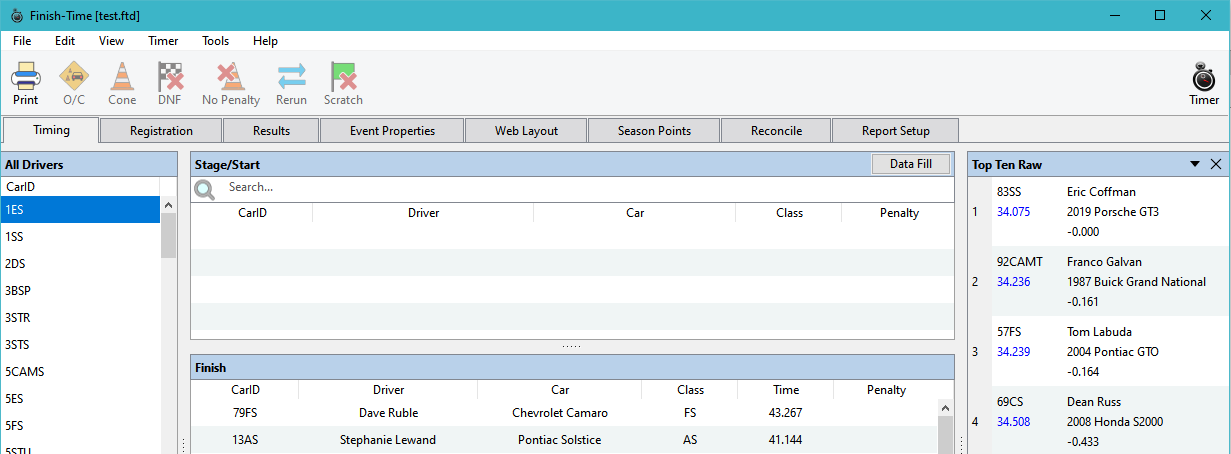
The main window is comprised of a Toolbar located at the top, and the Drivers List located on the left side. Below the Toolbar are the Function Tabs which are positioned and work like the tabs in a web browser. By design, the Timing Function Panel tab is not dismissible, yet the other Tabs are.
- Timing
- This is Finish-Time’s Timing and Scoring interface. Here is where you Stage, Penalize drivers and Manage all of the timing aspects of the event. This Tab is not dismissible.
- Registration
- This is the database management interface. Here, you can Register, Re-Class, or Delete Drivers from the database, etc.
- Results
- Here is where you can view or Edit run times and penalties at the close of the event and before Publishing the results.
- Bumping
- When required, drivers may be bumped to another class. For Club’s that do not bump drivers, this can be ignored. See Auto-Bump configuration for one-click bumping.
- Event Properties
- All properties for the current event are displayed here for configuration of the current event. These include but are not limited to Event Date, Chair, Location, Car Classes etc.
- Report Setup
- Customize all your printed reports including Results, Drivers List, Log Sheets, Worker Assignments, Event Stats and Income Report. Change printer settings, including Landscape or Portrait layouts, and adjust the margins as required.
- Web App Layout
- Choose a Style Sheet to reflect your club’s web site, and include an optional hyper-link in the Web Page menu. Example: Include a link back to a list of the current year’s event results.
- Assignments
- Group Drivers as required and assign Event Worker Assignments to one or more drivers.
- Reconcile
- Event income reconciliation and reporting.
- Season Points
- Presents all competition event points, include the option to manage "Club Points" including monthly meetings and any additional points that your club tracks throughout the year.
To open any of these Function Panels, select the View menu and choose the panel from this menu.
Drivers List
The Drivers List is located on the left side of the Main Window, it lists all drivers in the database, with multiple options including; only listing registered drivers. This list is in view regardless of which Function Panel you are currently working in.
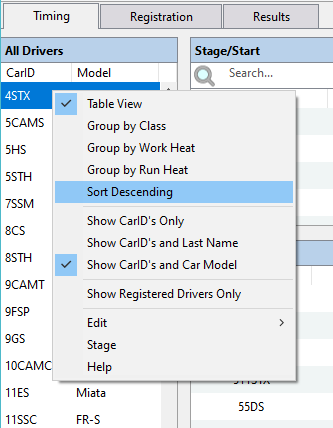
Select View > Drivers List, or right-click anywhere on the Drivers List.
- Table View Options
- This is the default view, drivers are listed in order by CarID in table form and sorted by CarID
- Group by Class
- Displays a hierarchical list of each driver, grouped by their Class and sorted by CarID
- Group by Run Heat
- Displays a hierarchical list of each driver, grouped by their assigned Run Heat and sorted by Grid Position
- Group by Work Heat
- Displays a hierarchical list of each driver, grouped by their assigned Work Heat and sorted by Grid Position
- Show CarID's Only
- Only lists the Drivers CarID, sorted by CarID
- Sort Descending
- Sorts the Run List in reverse order. Groups are sorted by the Group Selection, Table View sorts by CarID.
- Show CarID's and Last Name
- Lists the drivers CarID and Last Name in Table or hierarchical view
- Show CarID's and Car Model
- Lists drives CarID and Car Model in Table or hierarchical view
- Show Registered Drivers
- Regardless of the other view settings, this will only display Registered Drivers.
The Drivers List is the easy access point to the all of the drivers in the event database. For example, Right-Click a driver:
This opens up the same menu items mentioned above, and more including Editing the drivers results, registration status, and even Staging a Driver. It doen’s matter which Function Panel is in view.
 .
.
Adjust the width of the Drivers List by grabbing the vertical separation bar and drag it left or right for the best view for your screen size.
Accessory Panel
Located on the right side of the window is the Accessory Panel. Upon starting Finish-Time, the Top Ten Raw times are listed by default. Click the Menu Widget, left of the Close Widget to choose either the Top 10 Indexed Drivers, or T-Link Battery and Radio Integrity panel. (This option is only available with the Race-America T-Link Timer.) Clicking the Close Widget to dismisses this Panel. To re-open any of them, click View > Accessory Panel and choose which panel to display.
Adjust the width of the Accessory Panel by grabbing the vertical separation bar and drag it left or right for the best view for your screen size. Just like the Drivers List, the Accessory Panel is always in view regardless of which Function Panel is selected.
Notifications
Finish-Time notifies you of any minor events that have occurred during the event. A notification icon will appear at the bottom of the window when it does. Clicking this icon opens the Notifications panel. Or, click View > Notifications.
Program Concept
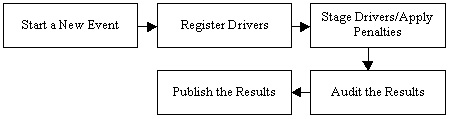
Finish-Time works on the "first out, first in" concept of Autocross. That is, when car #1 starts out on course, followed by car #2, it is expected that car #1 will finish first, followed by car #2. This does not limit the ability to run more than one car at a time however. The only limitation here would be the timer that you are using.
Workflow can be divided into 5 simple steps:
Being a cross-platform application, a Finish-Time event database (.ftd file) created on one platform can also be used on another. Your license key can also be used with each platform too. You could therefore, use the Windows version of Finish-Time at the event, then Edit and Post your results online at home on your Macintosh computer.
Migrating from one platform to another is easy; each version works exactly the same way. Each platform version also follows their respective Operating System’s Human Interface Design guidelines. Some of the Message Dialog Boxes that require an affirmative or negative response (Yes/No or OK/Cancel) from the user may contain verbiage that is slightly different between each platform. This makes for the best user experience since Windows users expect the same question to be asked differently versus a Macintosh user.
PAX Indexes
The PAX Indexes are derived from the Chicago Region SCCA. As of this writing, that would be the 2023 PAX/RTP Indexes. Each time you create a new Season Event Database, the Standard Classes and Indexes are included in the Season Event Database (*.ftd file) and referenced by all competition events added throughout the season. This list of Indexes that is managed in the Event Manager.
Use the Event Manager to check for download the latest PAX Indexes from the Finish-Time web site. We always post updated indexes as soon as they become available and any updates, or changes that may occur during the season.
The PAX Index date is displayed in the Status Bar on the bottom of the Application Window.

Timer Control
By default, when Finish-Time initializes the serial port, the timer is placed on-line, and any "finish" signals from the timer will be acted upon. To ignore the finish signal, when changing course workers or training a new timer operator, the timer can be disconnected without turning it off. When the timer is offline, the Timer button located on the right side of the Toolbar will animate with a Red Caution sign
Take the Timer Offline
Select Timer > Online, or Click the Timer Toolbar button and select On-Line. This will take the timer offline and any finish signal will be ignored. Perfect during course worker change-over.
Put the Timer Online
Select Timer > Online, or Click the Timer Toolbar button and select On-Line. This will place the timer online and all finish signals will be acted upon.
Reset Cars on Course
If your timer posts a Start signal, (some models do not) that driver will highlight green in the Start/Stage list. If at any time this goes out of sync. selecting Timer > Reset Cars on Course, the same option can be selected by clicking the Timer Toolbar Button.
Create a Season Event Database
In this section, we will create a new Season Event Database. All competition events and points are stored in a single database. By doing this, we can calculate both competition points and any optional "Club" points that your club uses, event during a timed run. Example: Points for Chairing an event. So, if your club has scheduled 12 Autocross events this season, all 12 of them will be embedded into the database we're going to create next.
Click File > New Database
The New Season Database wizard appears, you have to options here. Import Properties from a Previous Event. That would be a Finish-Time Database from last year or Use Default Properties.
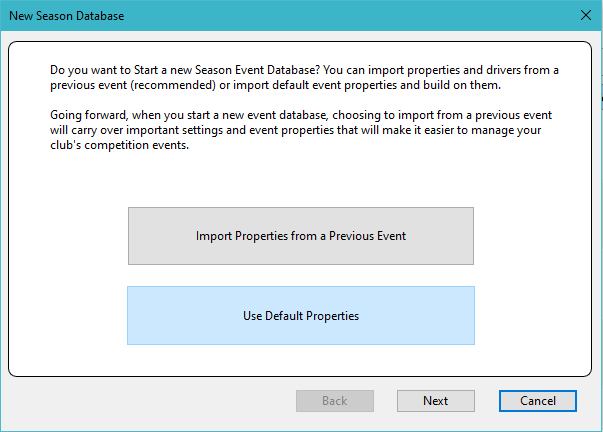
When Choosing Import Properties from a Previous Event, the file selection dialog box appears to choose that event.
Whichever choice you make, you will have the opportunity update your current Classes and PAX Indexes. Then click Next.
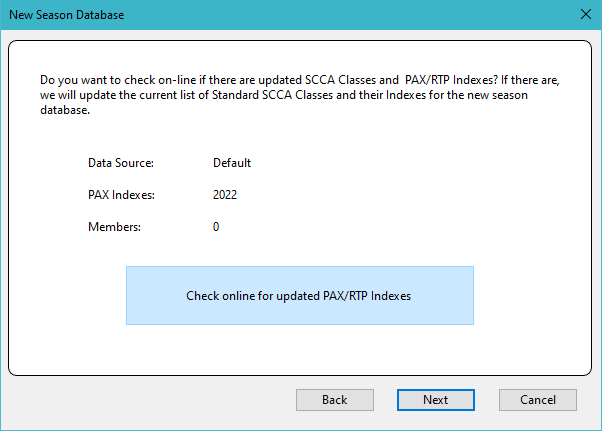
Selecting Check on-line for updated PAX/RTP Indexes, Finish-Time will go to our website to retrieve the updated indexes if they exist. Click Next.
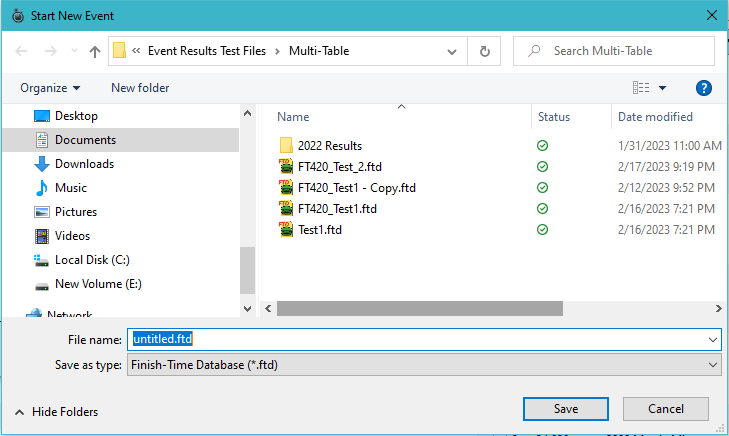
Select a location to save the database.
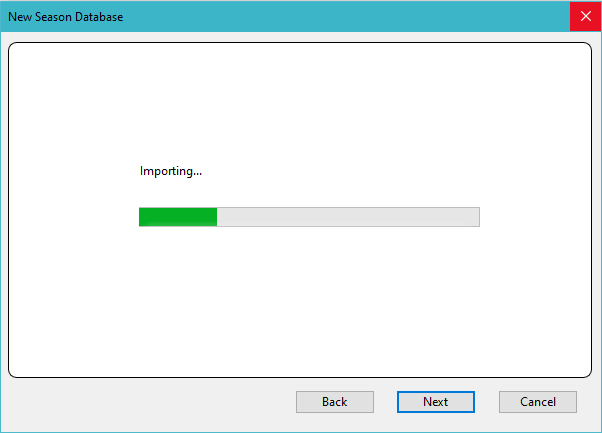
The Importing process begins while updating the PAX Indexes as needed...
And now you have your first Event Season Database. Next up: Creating your first Competition Event.